ML Deployment Platform (Independent Project)
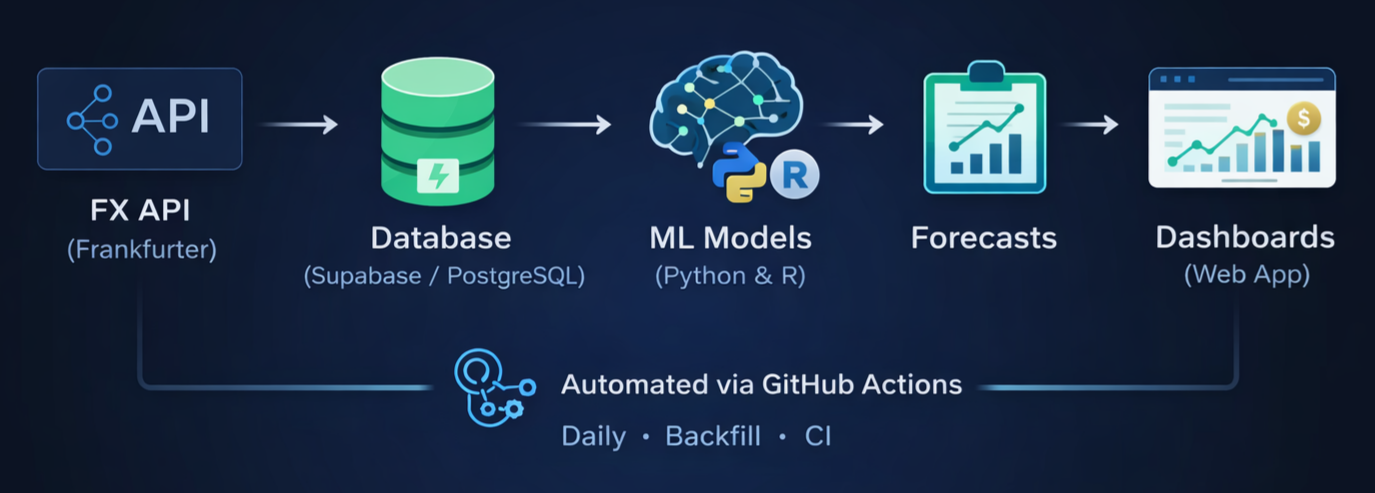
This project is a fully automated ML deployment platform for FX forecasting. Every model registered in the system runs on autopilot: new FX closing rates are ingested daily, all models are executed automatically via GitHub Actions, and their predictions are stored and pushed straight into a live dashboard. The result is a hands-free, production-grade forecasting workflow — built end-to-end from data ingestion to model execution, storage, and visualization.
Features
- Infrastructure: Supabase Postgres + Django web interface
- Automation: Daily ingestion and forecasting pipelines via GitHub Actions
- Model Layer: Plug-and-play registry for Python and R models
- Outputs: Stored predictions, live dashboards, and visualized backtests
You can access the live FX views through the buttons below.
Project Links
Plug-and-Play Model Integration
You can plug in your own forecasting model by following these steps:
Download the template for your language:
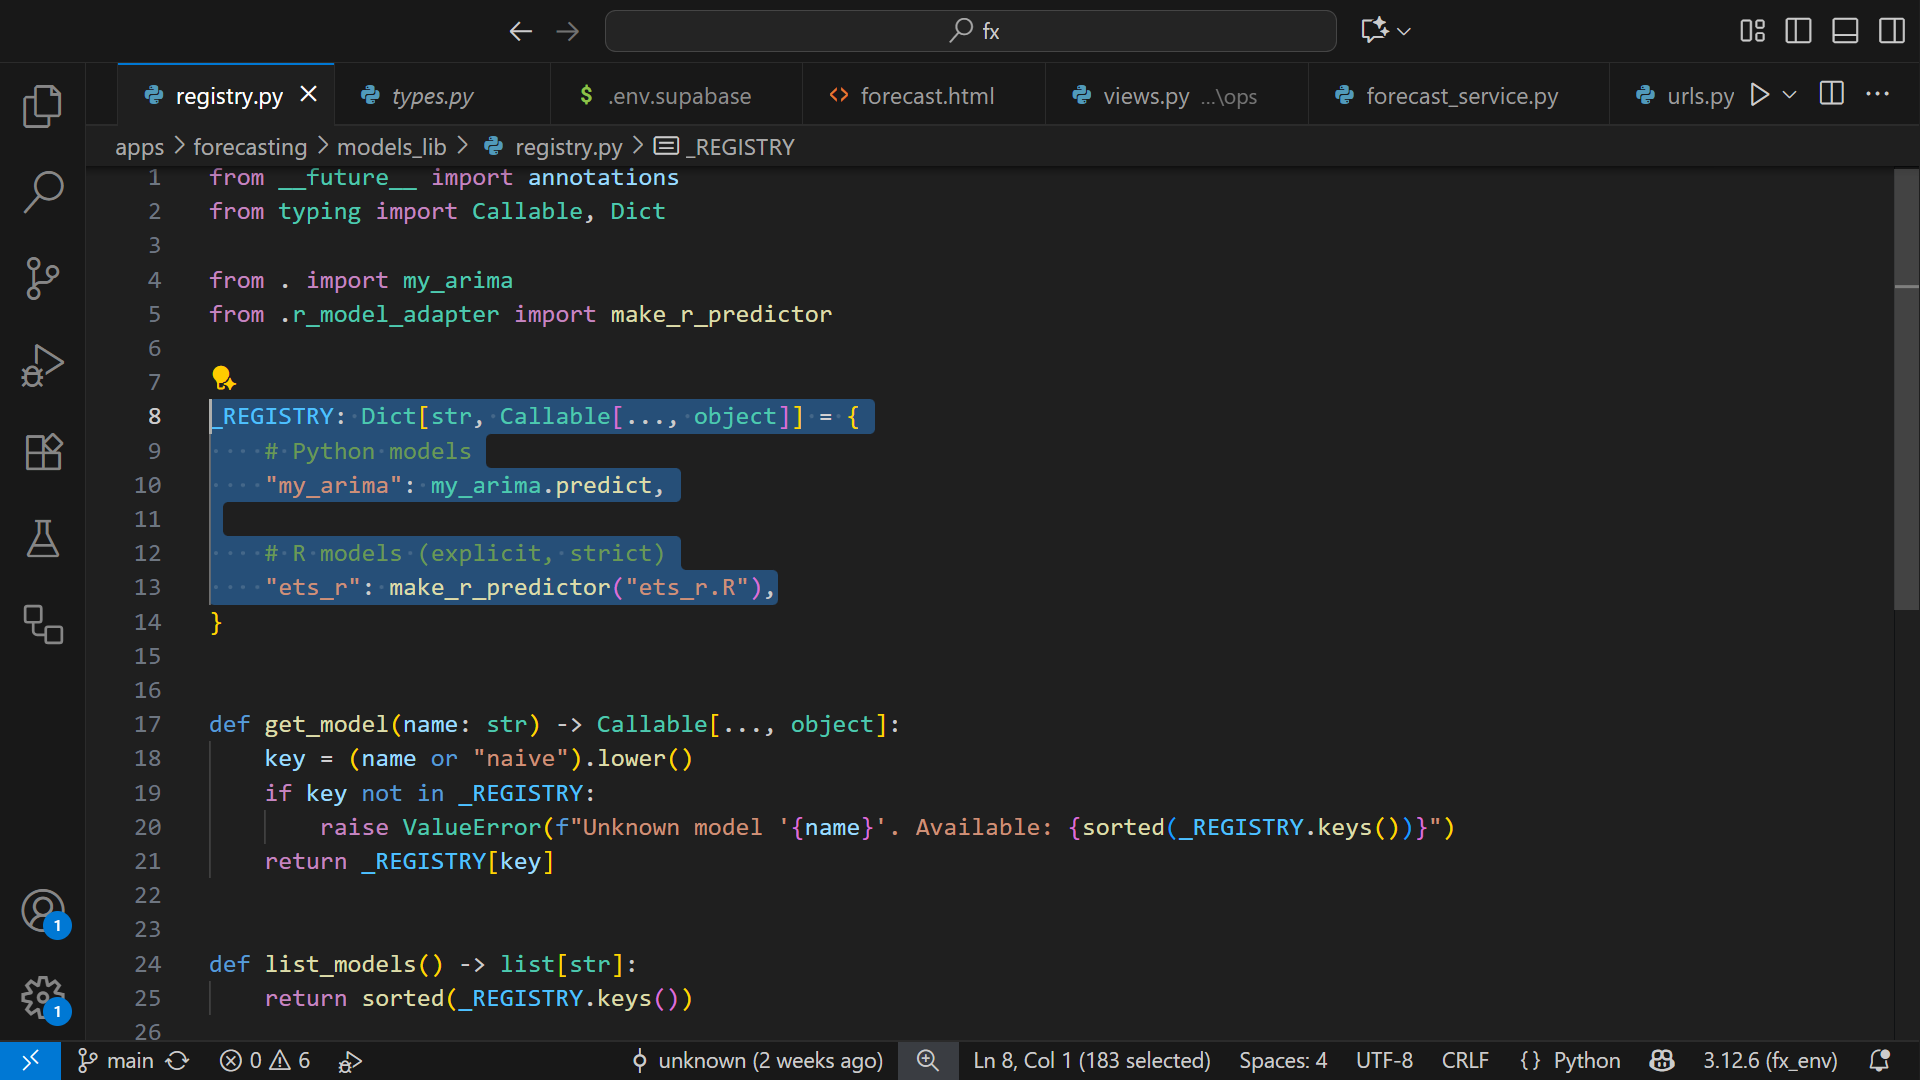
Open the template and edit only the section marked:
"PART 2 — MODEL LOGIC (THIS IS YOUR AREA)"

In "PART 3", you will see where to set your model name (e.g., 'my_model').

Then:

Python models
-------------
Save the file to:
apps/forecasting/models_lib/

Rename it to match your model name (e.g., my_model.py).

Open:
apps/forecasting/models_lib/registry.py

Add at the top:
from . import my_model

Add this to _REGISTRY:
"my_model": my_model.predict,


R models
--------
Save the file to:
apps/forecasting/r_models/

Rename it to match your model name (e.g., my_model.R).

Open:
apps/forecasting/models_lib/registry.py

(You do NOT add an import at the top for R models.)

Add this to _REGISTRY:
"my_model": make_r_predictor("my_model.R"),
Setup notes
• One model, all currencies
Just a heads-up: to keep things simple, any model you add will automatically forecast all currencies. In real FX work you’d normally have one model per currency pair, but I simplified it here so you don’t have to manage dozens of models.
• Models run from their logic (not serialized files)
FX data changes fast, so instead of freezing a trained model and loading it later, this platform runs the model directly from its logic every day.
That’s actually how most FX forecasting agencies do it.
• Don’t forget the packages
If your model needs extra libraries, just add them:
– Python packages → requirements.txt
– R packages → inside the GitHub Actions workflow.
• The default models are just placeholders
The models that come with the system are super basic — just enough to demonstrate the workflow.
They usually just repeat yesterday’s rate, which is why the variation column is usually zero. So don’t use them for anything serious.
• Evaluating Your Own Models
This project intentionally does not include a model-comparison page.
Any evaluation or comparison between models should be performed in your own notebook.
For forecasting theory, the book by Hyndman and Athanasopoulos has helped me a lot,
and I strongly recommend it. In that book, the authors highlight the use of AICc as a practical criterion for selecting models. (link)
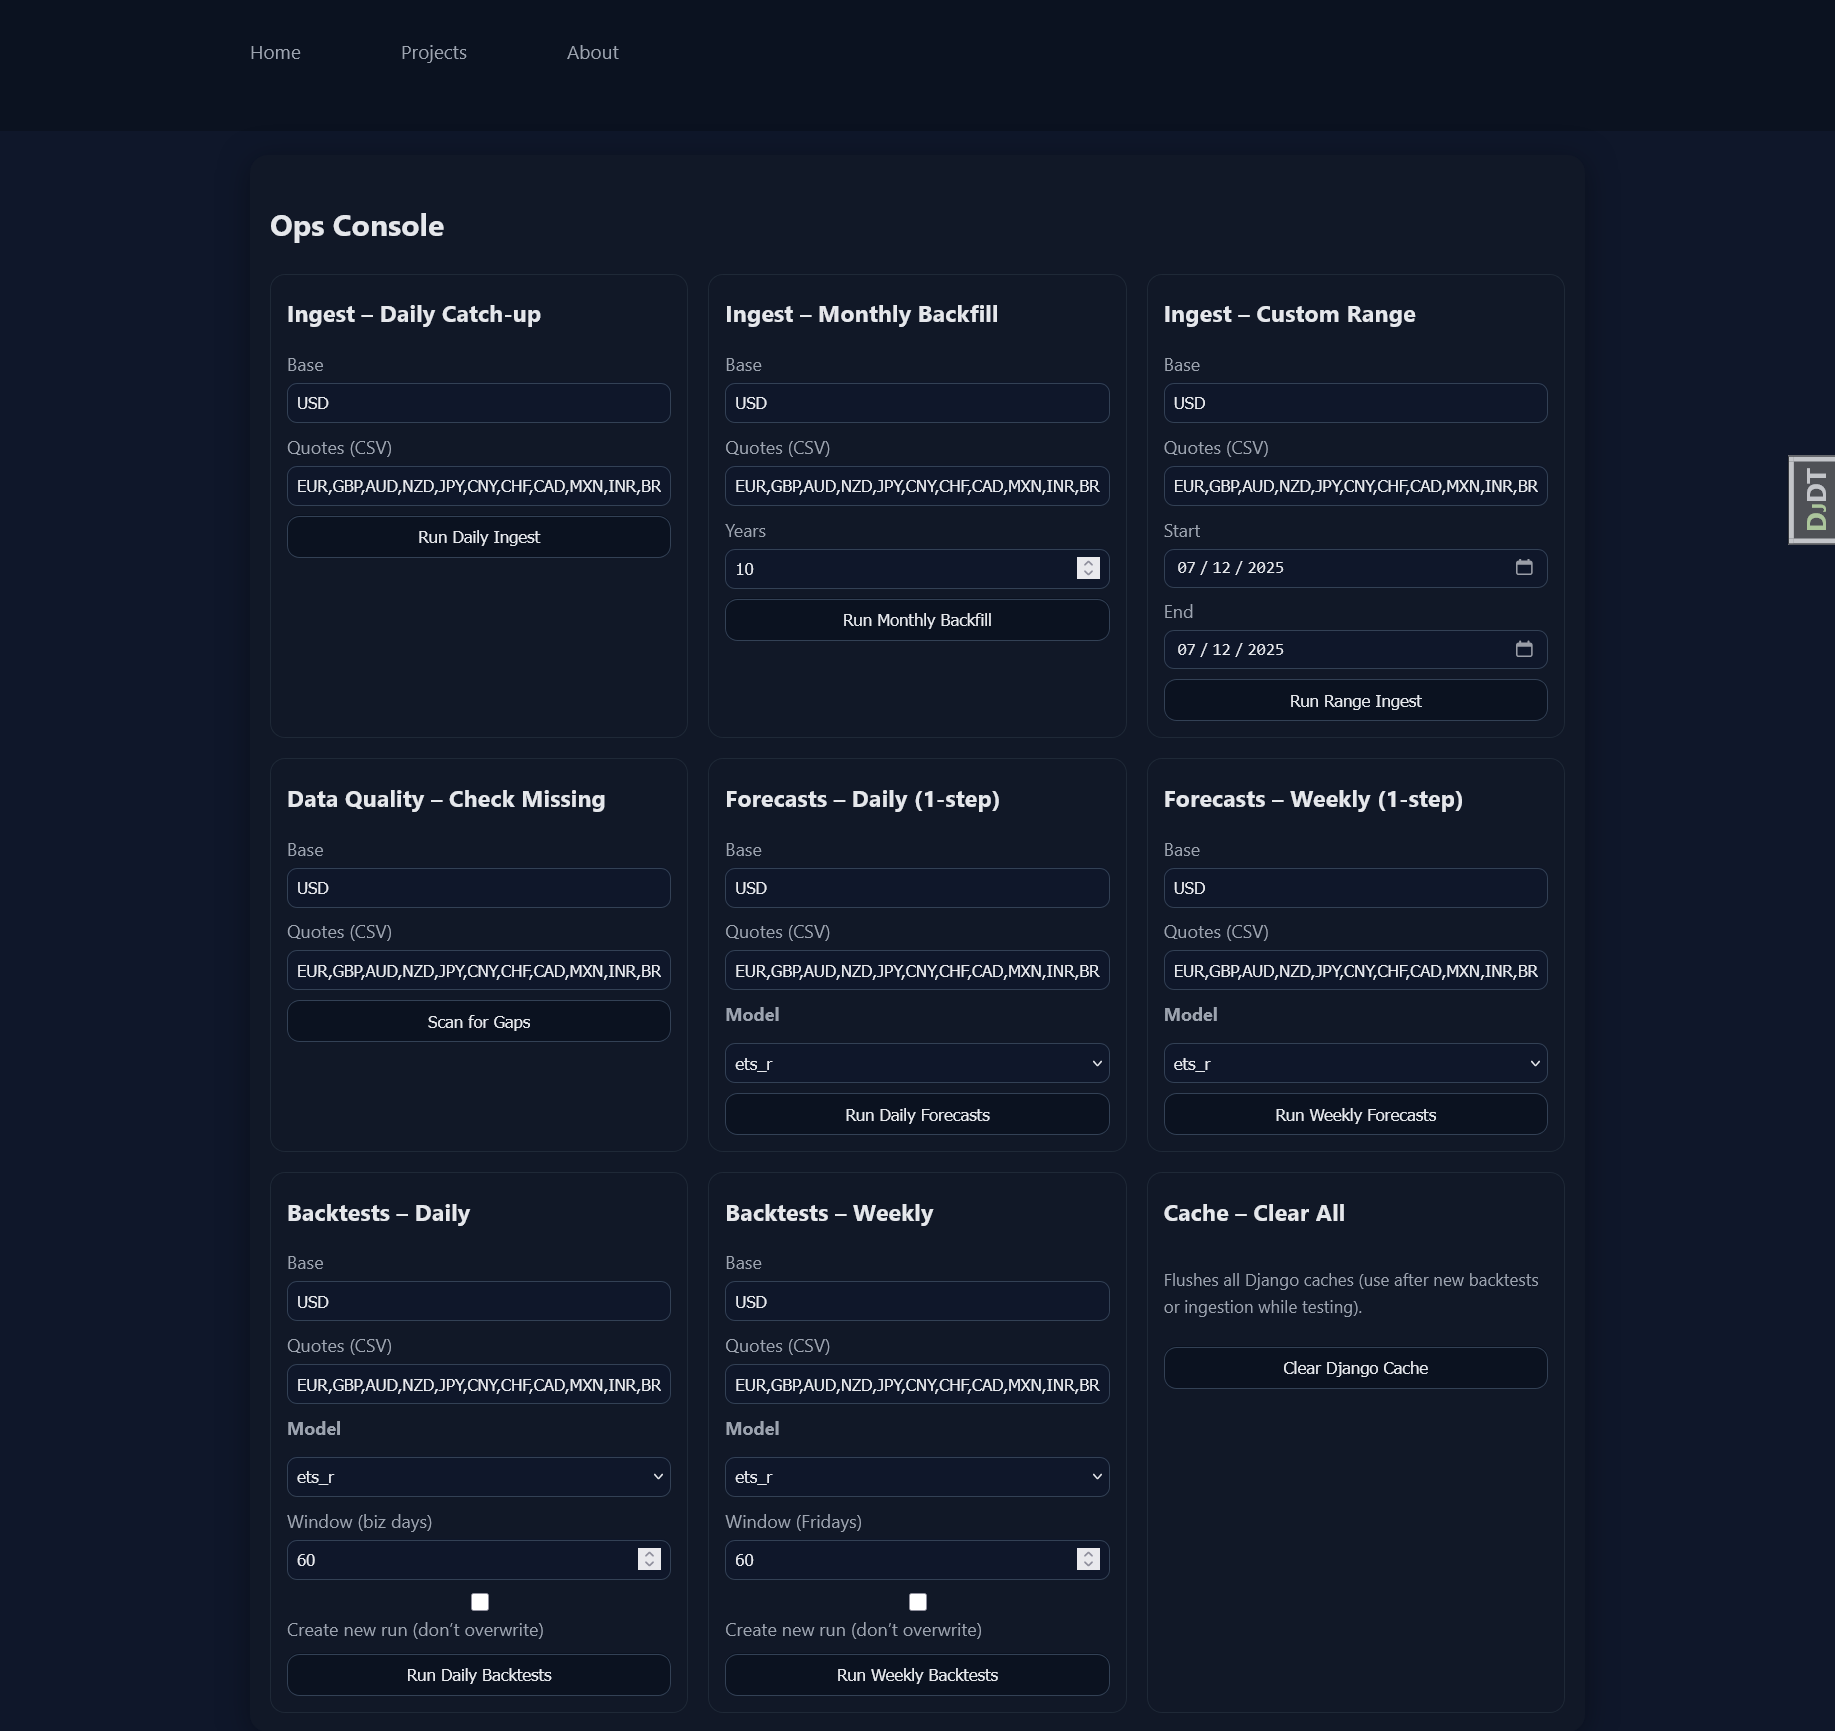
• Use the Ops Console for full control
There’s a small Ops Console where you can:
– pull new FX rates
– run forecasts
– run backtests
It writes directly to the database, so it’s password-protected and only enabled locally.
• About timeframes (Daily, Weekly, Monthly)
The original idea was to support three timeframes — daily, weekly, and monthly.
Most of the backend work for weekly and monthly is already there, which is why you’ll see “Week” options in the Ops Console.
But they still need a few adjustments to be fully ready. For now, I’d recommend sticking to the daily timeframe — it’s the most complete and stable.
• Dashboards are cached
Rates come in every day around 16:15 CET, and the dashboards stay cached for 45 minutes.
If you’re tweaking a model and want to see the change immediately, just hit the “Clear Django Cache” button in the Ops Console.
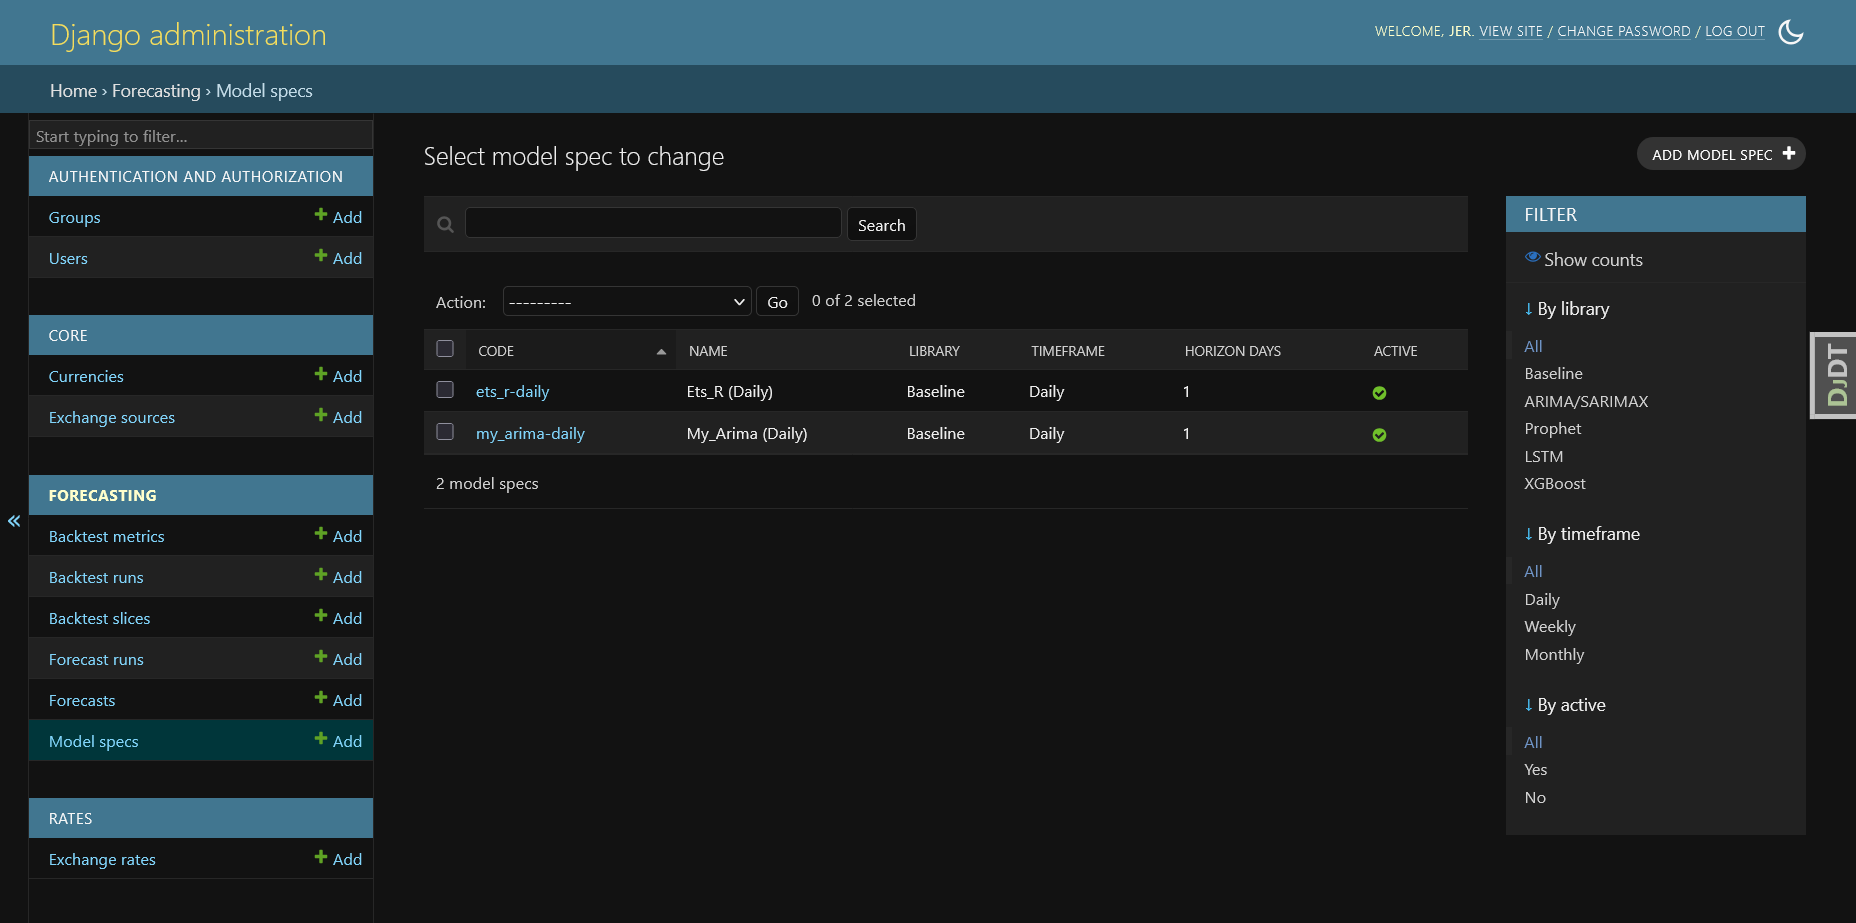
• Dictionary vs Database (REGISTRY vs Model Specs)
When you add a model to the _REGISTRY dictionary, it immediately becomes available in the Ops Console.
From there, you should run a forecast (or any model task) at least once — this first run automatically creates an entry
for the model in the ModelSpec table in the database. Once the model exists in ModelSpec, it becomes an
official part of the platform and will be executed automatically by GitHub Actions on the daily schedule. If you want to
completely remove a model from the platform, deleting it from _REGISTRY is not enough — you must also delete its
entry from the ModelSpec table in the database.
• A small note of gratitude
I want to thank everyone who has ever contributed code to the world. Modern AI may have been created by scientists,
but it was trained on code written and shared by generations of developers, hobbyists, and open-source
contributors — work from which we all benefit. I’m also grateful to the researchers whose work laid the
foundations of machine learning. Modern AI tools significantly accelerated development, enabling me to
build this system within a few months.
Thanks for reading — hope this overview sparks ideas for your own ML deployments.